 When I bought my 87GN, I knew I should have gone through a car wash or used a hose to look for leaks, but for whatever reason (long story), I didn't. A shop near by put it up on a lift and we found two quarter (as in 25¢) sized rust holes in the drivers side floor pan. No problem, I can fix that...
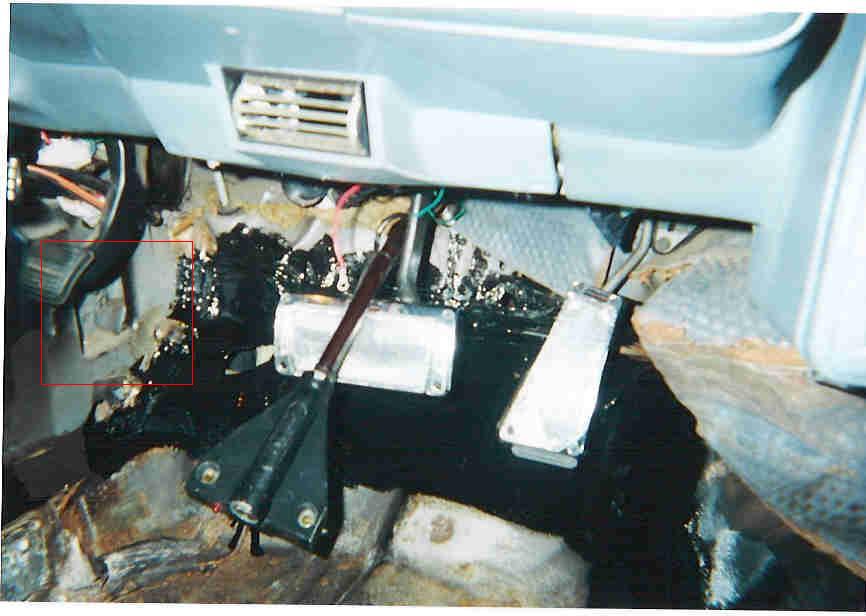
Soon after, I take it to a car wash and it leaks. One drip from the drivers side front "A" pillar, and one mysteriously coming from above the rear seat on the drivers side. Later, I would also find three leaks under the driver side dash.
The next day I find another leak from a dime sized hole behind the chrome trim ring above the windshield during a windsheild repair. We patch the hole and at least that one is solved.
I went to have a new headliner put in, the guy finds the source of the second leak (above the rear seat on the drivers side). My car has a sun roof. For those of you who do not know, sunroofs have hoses connected to the "pan" (the pan is what the sunroof goes back and forth in) that drain to the four corners of the car. The pan was badly rusted where the rear driver's side hose connected to the pan. Since I don't have the money to repair or replace the pan (it is after market, so there won't be one at the boneyard), I decide to get it sealed sealed with some silicon to fix the problem.
The resulting rust in the floor pans also need to be fixed and the procedure is below.
 |
|
|
 |
|
|
 |
|
|
- Remove the seats. The driver's seat comes out after removing the five nuts. The two electrical connectors snap off. The passenger seat also comes out after removing five nuts. You will have to unscrew the little plastic pieces that cover them.
- Next, the door sill plates are removed by taking out four more screws.
- Remove the center console shifter knob ("C" clip).
- Open the door to the center console. Remove the two screws.
- Remove the ashtray. One screw removes the shifter/gear indicator cover.
- Remove the two screws at the front of the console.
- Lift up and remove the center console; disconnect the light for the gear indicator.
Note: You may want to spray some WD-40 on the little spring that is used for the gear shifter, mine broke before I bought the car.
- Remove the rear seat bottom by pushing back on the outer front of the seat
bottom.
- Now you can remove the carpet. Try to put it somewhere warm and dry. The carpet pad will stick in some places, just be careful not to rip it.
My carpet was fine, but my pad was damp and rusty, so I bought a pad that was twice as thick from a local auto upholstery shop. I paid $30 and it was enough for what I needed plus some extra for places like the firewall, transmission hump, etc. Keeps it cooler and quieter.
- The POR15 instructions say not to remove the rust, because the POR15 adheres better when there is rust. However, I really don't like rust so I got rid of whatever I could. I tried wire brushes and sandpaper wheels on my drill, and the Black and Decker mouse sander, but I found the best way to remove the rust was by hand using a piece of sandpaper. I was a real pain, and it took some time, but I was real happy with the results. It will need to be real course sandpaper; I used 40 grit.
- Once you have removed teh rust it is time to coat both sides of the floor pan with POR15. I found that a quart of POR15 was enough to cover my floor plans inside and outside (top and bottom) twice. I also applied some on the bottom of my gas tank and trunk.
Read the instructions before you use it. They also have floor pan kits and a bunch of other stuff. Check out www.por15.com .
- Now to patch the holes. I used Bondo polyester fiberglass. It can be found at most auto parts stores.
Read the instructions carefully. Work quickly in a well ventilated area. Mix the resin by combining the resin and activator. To much and it will dry too fast, not enough and it will dry too slow.
- For a hole the size of a quarter, I got a two inch by two inch square and laid it over the hole. Paint, brush, dip or dab the resin over the patch. Repeat for each hole. Let it set for 24 hours.
- After the fiberglass has set, apply more POR15 over the fiberglass. Both for added strength and for aesthetics.
- After you are done with the fiberglass and POR15, install your new carpet pad and carpet. Re-install your center console and seats.
- Enjoy the fruits of your labor.!
The Job can maybe be done in a weekend:
- Friday night; remove carpet, seats and center console. Sand floor pans. Apply POR15.
- Saturday night; apply Fiberglass.
- Sunday night; Apply more POR15.
- Monday night; reinstall carpet, seats and center console.
My car leaked from the windshield, sunroof, both door windows, firewall (by the steering column), and lastly from some really bizzare place next to the fuse box kind of where the door hinges are.