First, my credentials:
- I have just gotten my Limited back from having the driver's door hinge pins replaced. The estimator (who is also a co-owner) gave me several pointers that are a part of this article.
- I have a 1963 Wildcat convertible. If you think t-tops are bad, try working with a weatherstrip that has a split to accommodate a hinge! Not to mention the unique issues where the vent window, windshield header and the leading edge of the roof all come together.
The foundation of this system is the body shell itself. If the shell is tweaked in any way, getting a good fit of the various moving/removable parts will be a challenge, at the very least. Unfortunately, there is little documentation of such things as door opening dimensions. So, we've got to do the next best thing.
The next layer in the system is the door itself. The door must fit into its opening properly. This is easy to verify.
- Does the door open and close easily, and without the rear edge dropping as the door is opened? A quick check for hinge pin wear: With the door open a few inches, try to lift the door by the outside handle. If there's any vertical movement, get new hinge pins and bushings from GM (cost about $15) and make arrangements with a reputable body shop to install them (cost me $90). Any attempts to adjust the window if the hinge pins are worn will only be a source of frustration, as the door does not fit the opening properly with worn pins, no matter how well it lines up.
- Check the fit of the door's bottom edge compared with the rocker panel. These 2 lines must be dead parallel. If the door is hanging right, the only way this check fails is if the body has been either wrecked or tweaked (i.e. by one too many vigorous launches without adequate bracing), or if the door has been damaged. If this check fails and the door is known to be good, the rest of the door opening is also suspect.
- Check the fit of the rear edge of the door with the front edge of the rear quarter panel. These should match within 1/16" in all 3 dimensions. Again, assuming the hinges are OK, this check only fails due to accident or tweaking.
- Check the alignment of the top edge of the door with the rear quarter panel and the bottom of the A-pillar. This check is admittedly a little bit of by-guess-and-by-golly, but if there hasn't been any damage or wear, this fit is relatively easy to eyeball. It's also a good last check to verify that everything (up to this point, anyway) fits OK.
The next layer in the system is the door glass. This step is a quickie (for now). We'll visit this in greater detail later. Roll the window all the way up and then open it about 1". Eyeball the front and rear edges of the glass to verify that the edges are reasonably parallel to the window opening. If one edge is off, verify that the others are similarly off. If so, adjust the window. (More commentary later.) If not, then the body shell is out of alignment and trying to fit the window to any edge will be a poor compromise.
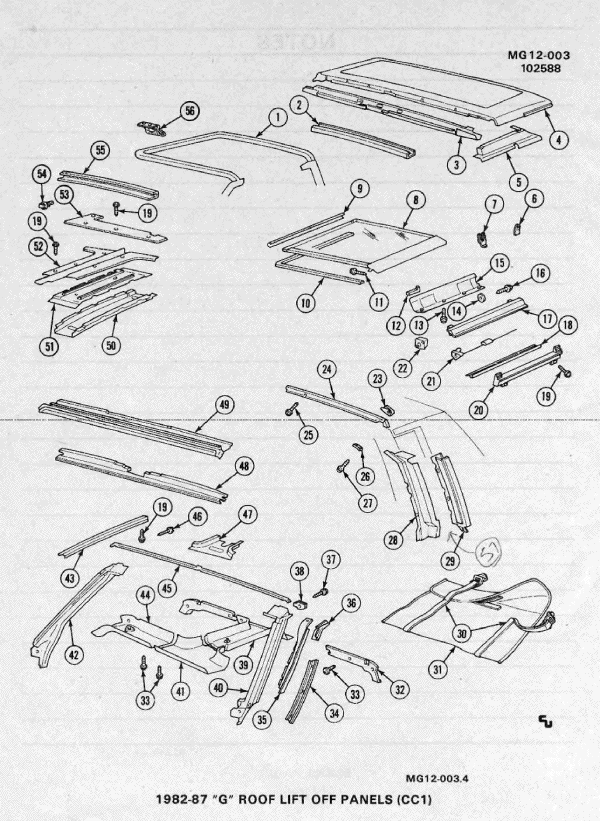
Now for the t-top panel. These steps assume that the panel is properly assembled. First, verify that the panel is properly fit into the roof structure (fore & aft, left to right, and vertical) and is snug when latched down. If not, adjust the panel and latches. Now comes the tricky part. With the panel fully installed and the door window rolled all the way down, run your fingers across the entire sealing surface of the weatherstripping, starting at the base of the A-pillar and ending at the upper front corner of the quarter panel. There should be no discontinuities in the weatherstripping that exceed about 1/16". Pay particular attention to the front and rear edges of the t-top panel. Any (and I mean any) discontinuities need to be addressed. Adjust the fit of the panel as necessary to get rid of any "steps". If there is a gap, verify the cause. If the edges of the weatherstripping are damaged, replace the offending item(s).If there’s a gap at one edge and a bunching of material at the other end, R&R the weatherstripping and reinstall correctly. If there is bunching on both ends, determine the likely culprit. Was the panel seal replaced and not trimmed? How about the A-pillar seal? Was the rubber on the t-top panel inadvertently stretched during installation?
Once the weatherstripping is OK, then recheck the window alignment as described above. If the window does need adjusting, it will be very easy to see how much adjustment is needed and in which direction. Bear in mind that there is really only one way for the window to fit properly at all exposed edges. If the body isn’t off-kilter some way, this alignment point will be quickly arrived at. If the opening is off (even a little bit), you are inviting sheer exasperation.
I have glossed over the specifics, as the shop manual (with diagrams) gives a nicely detailed procedure.
Check out this article as well, for an Excel Spreadsheet parts break out:
