 NOTE: This procedure will only work on a car with a console mounted shifter.
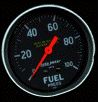
- Disconnect the battery. I used an Autometer isolator and mechanical 0-100 psi "fuel pressure" gauge.
- I mounted the isolator to the bracket where the power steering reservoir is mounted using the existing factory bolt.
- I depressurized the fuel rail and removed the shrader valve.
- I used a hose that is 15" long.
- I connected the hose to the fuel rail with A -6 Earl's Perform-O-Flex line and two 90* hose ends.
- Before installing the second hose end, I covered the hose with a piece of firesleeve to protect the wire harness from abrasion. Black split wire harness conduit would also work.
- I then mounted the gauge onto the steering column using a gauge cup and a hose clamp. Make sure the gauge will clear the column when the tilt feature is used.
- I connected the gauge to the isolator using -3 Earls Speed-Flex line with straight hose ends and a 90 degree adapter on the gauge.
- Since my car doesn't have cruise control, I used the knock out plug in the firewall below the steering column to run the line to the gauge.
- Before mounting the isolator, fill the line from the isolator to the gauge using an antifreeze/water mixture. Hold the isolator higher than the gauge to purge the air out. I used an eyedropper.
- I wired the gauge light to the headlamp switch. To get around the steering column lower bowl rotating, I completely removed the linkage from the column to the transmission and also removed the bracket that is on the brake combination valve.
- I drilled a 1/16" hole into the metal bracket for the wire harness that is located below the master cylinder.
- I then safety wired the lever to this metal bracket so the column was always in "park".
- I removed the P/N switch from the column since it was no longer functional.
- To get reverse lights, P/N signal to the ECM and a safety start, I got a shifter from a wrecked automatic Firebird/Camaro- all of these functions are on a shifter mounted switch.
- I cut off the bracket from the F-car. I cut a slot in the GN shifter handle so the tang from the F-car switch would go into it.
- I clamped the new switch bracket to the GN shifter with a pair of Vise-Grips. Then checked it with an ohm meter to make sure all of the switch functions occur correctly with the shifter in each position.
- Weld the bracket to the shifter. The bracket itself has slotted mountings for small adjustments.
- I then made a wire harness with 18 gauge wire using the correct GM mating connectors and terminals from the GN's P/N input and reverse lamp connectors over to the correct wires in the F-car switch.
- I then removed the purple wire from the ignition switch and used 10 gauge wire to go to the F-car switch and back to the ignition switch for the safety start.
The wiring connections look like this:
P/N input to ecm
.
Reverse lamps
.
Safety start
.
Wire to term S on ignition switch