 The following is a "How To" for making your own low cost fuel pressure gauge. Many vendors charge as much as $80 for a fuel pressure gauge with a long enough hose to monitor fuel pressure during a WOT blast. I don't make any claims to the accuracy of the gauge as many different gauges could be substituted provided it reads up to about 100psi. Any gauge can be used provided it comes with a gauge to hose
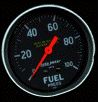
adapter. On the recommendation of a friend and fellow list member I decided to use a fuel pressure gauge from J. C. Whitney. The gauge kit I chose cost $29.95, their part number is 12DH9407U(mfg. part# TU-113C). You'll also need to get a 60" air conditioning charging hose. These hoses are available at most parts stores. I picked mine up at Pep Boys for $9.95. Ensure it has the correct fitting which will mate to your fuel rail before proceeding any further!!
Measure the length, with the hose, from the front of the fuel rail to the windshield. The hose I used had different end configurations. One end was straight while the other had a 90 degree bend. I chose to use the 90 degree end. Once you've measured the length cut the hose, should be about 3-4 feet. These hoses are high pressure so you'll need to use tin snips or wire cutters, scissors won't cut it (no pun intended!). Typically A/C hoses are rated for about 300psi with a burst pressure of over 1000psi, plenty for our little project.
Step 2.
Using the supplied gauge to =BC inch hose fitting, slide the fitting into the cut end of the hose. I applied from fuel safe gasket sealer to ensure a leak free fit. Using the supplied constriction clamps, secure the hose to the fitting. I actually double clamped it to be on the safe side. In addition, I wrapped the fittings in black electrical tape to keep them from scratching anything(has no real sealing value). Again I used the 90 degree side of the hose. Because I was taking the gauge 180 degrees to the windshield, I was already half way there without any kinks in the hose.
Step 3.
I attached the fitting to the gauge. Again I used some fuel safe sealer to ensure a proper fit.
Step 4.
You'll need to trim the seal in the hose which will mate to the fuel rail. I don't know why but the gasket seems to be too long for our application. The gasket lip raises way above the pin which depresses the pressure valve in the fuel rail. I didn't trim it the first time and wasted the gasket, even though it still seals to this day! If you don't cut it, it'll just get compressed so far that it'll split and you'll be forced to pick it out. I don't know if it split because I screwed the hose on to tight. Pulling 55psi with the stock pump, I didn't want to risk any leaks under the hood at WOT.
There you go!! You now have a high pressure, long hosed fuel pressure gauge which will reach the windshield and cost about $40 plus about 15 minutes of your time. When using this gauge during driving, make sure the hose is clear of moving and hot parts under the hood. In addition, I duct taped the gauge to the windshield so it doesn't move. I'm sure if you look real hard you can find cheaper components.
Provided you can trust the hose pressure and the gauge accuracy, it should be a success!!
Happy tuning!